These are the EASIEST spookiest treat for halloween! All you need are 3 simple ingredients and 10 minutes. Enjoy this perfect vegan treat to bring to a Halloween party.
This post may contain affiliate links. Read my policy page for more information.
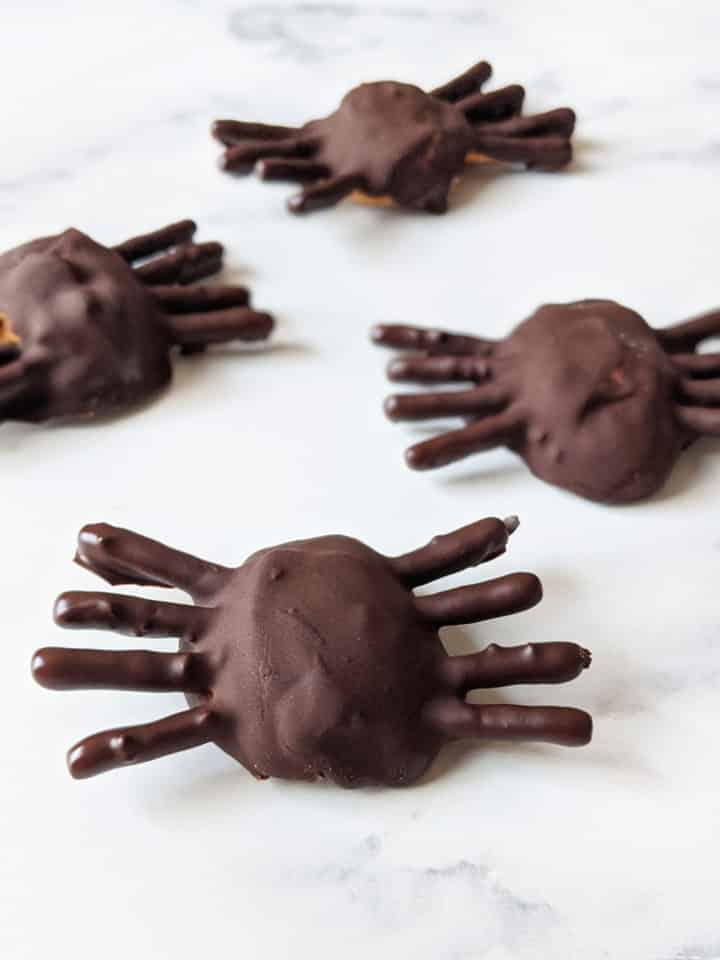
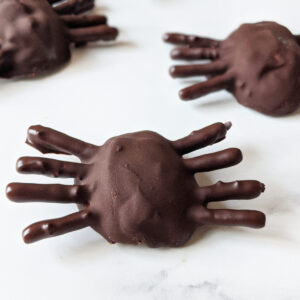
These littles critters are so fun and so tasty. I love making these Chocolate Peanut Butter Spiders because they really take no time at all and they’re so cute!
I’m all about easy desserts lately so I may just have to enjoy these any time of year. The combination of peanut butter, chocolate, and salty pretzel goodness is just so perfect.
After I made them I realized there’s a couple of ways to make them more spider-like. First, you can use the regular pretzels instead of the sticks and break off the curved sides to use as legs. And second, I think adding a couple chocolate chips as eyes would be cute. Just some ideas for ya to try!
Ingredients you’ll need
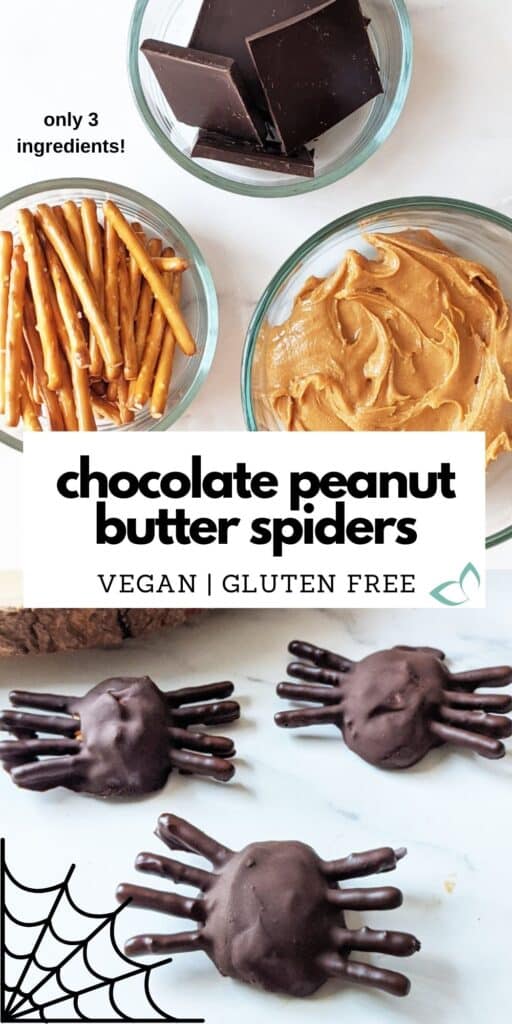
- Peanut butter
- Dark chocolate
- Pretzel sticks
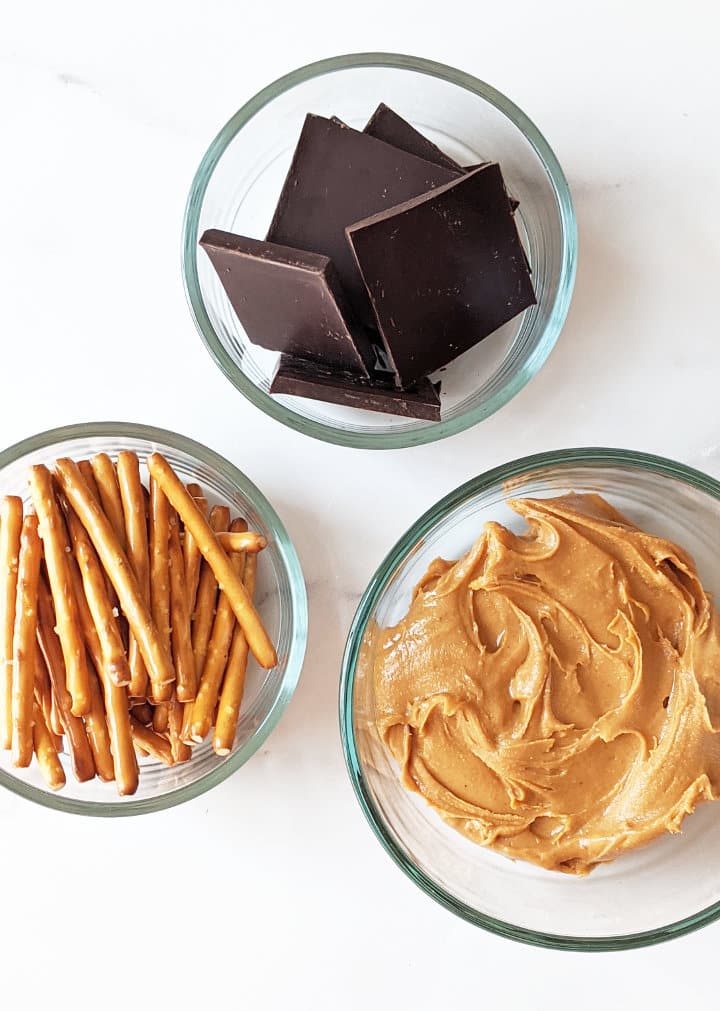
Just these three ingredients and you’re all set! Make sure to grab vegan dark chocolate. Most will be but double check that there’s no milk in it just to be sure.
For peanut butter, I recommend one that is creamy and thick. If it’s too drippy it may have to refrigerated before it can be rolled into balls.
How To Make
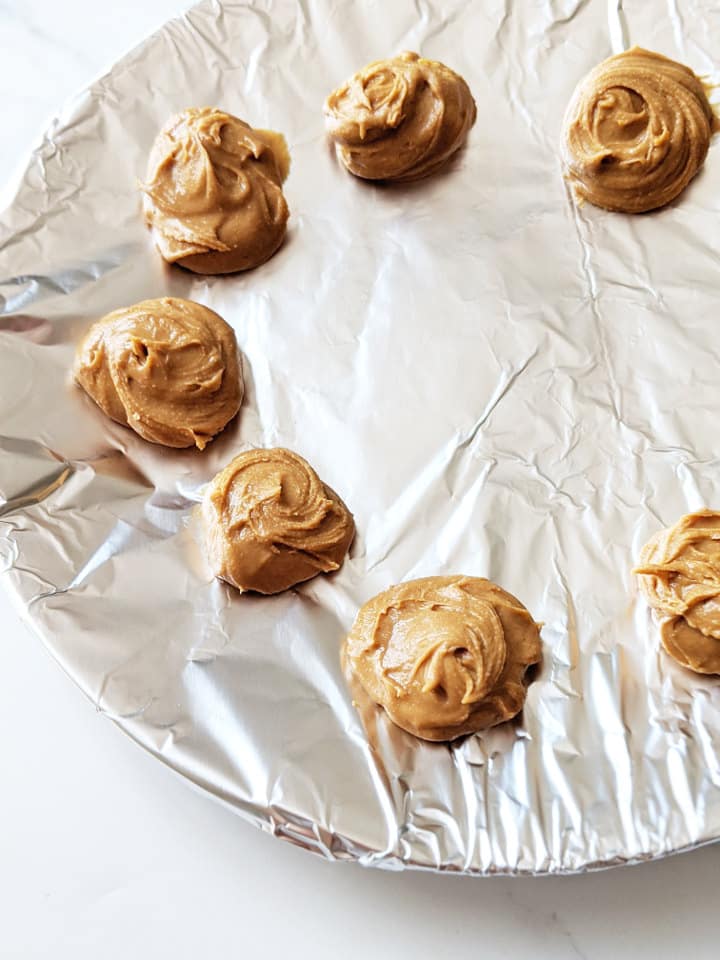
Roll the peanut butter into balls, about 1 tablespoon each. If the peanut butter is too runny, place in the refrigerator or freezer for 10 minutes until it’s more manageable. The balls don’t have to be perfectly smooth but they should hold together somewhat without becoming a runny blob.
Place the peanut butter balls on a baking sheet or plate lined with wax paper or aluminum foil. Set in the freezer for 20 minutes to harden.
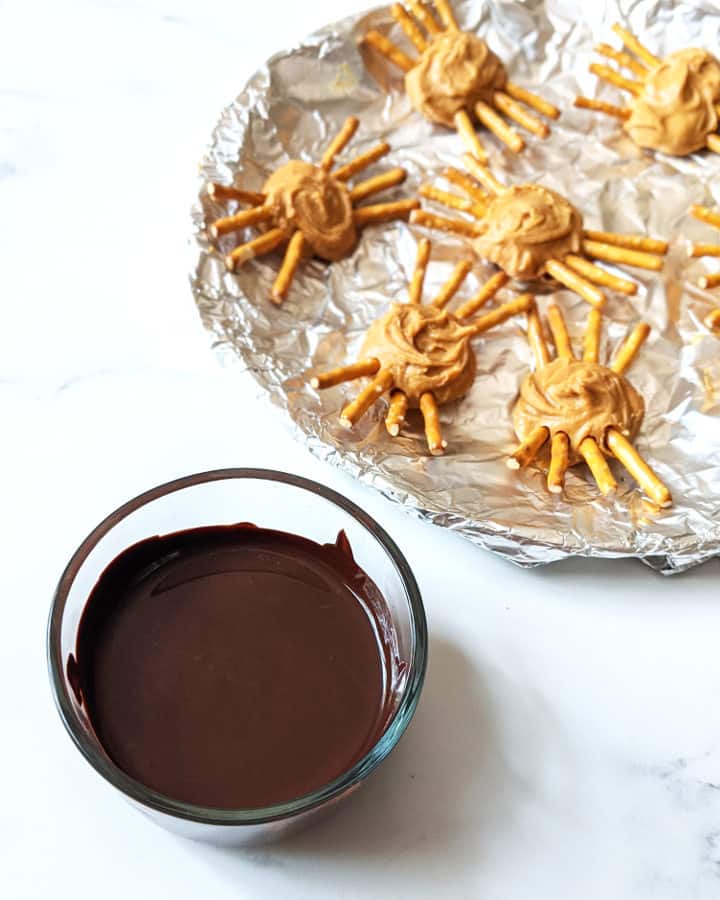
Right before the 20 minutes are up, melt the chocolate. Place the chocolate in a microwave-safe dish and heat for 15-30 second intervals, stirring in between. Be careful not to burn the chocolate. Usually you can stir out the last remaining lumps without needing to microwave more.
Remove the peanut butter balls from the freezer and add the pretzels. Break each pretzel stick in half and use the broken end to gently push into the ball on either side to create “legs”. It’s easier to first lift all the balls off the sheet so they’re no longer “stuck”, then add legs. This ensures that you don’t have trouble getting any unstuck from your choice of liner and accidentally knocking off any legs to the ones you’ve already added.
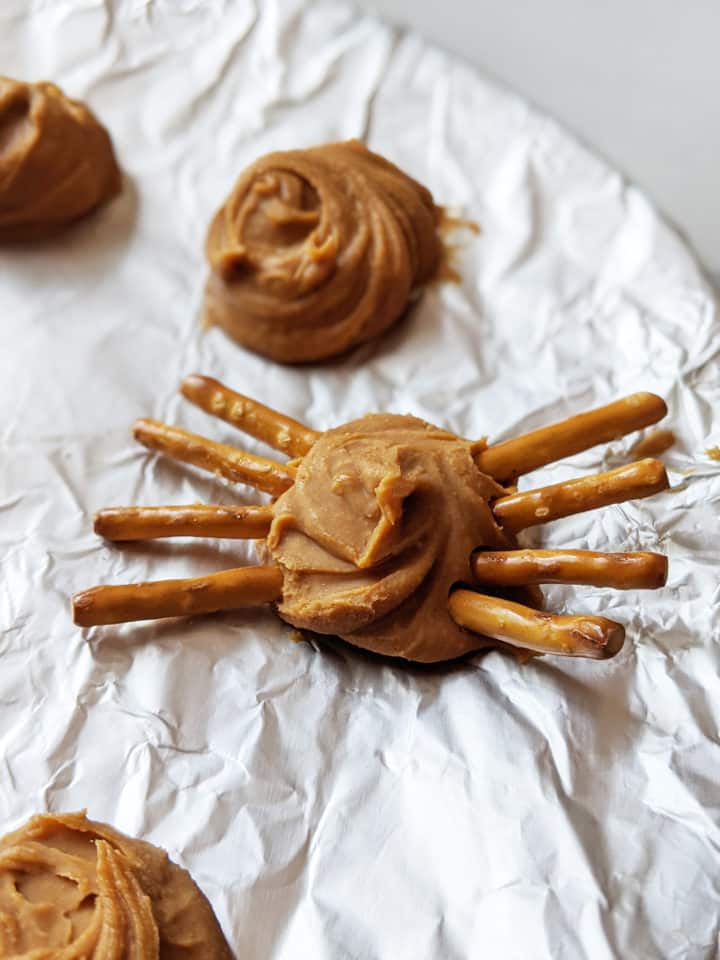
At this time, you may want to place them back in the freezer for 5 more minutes to firm up even more before coating them in chocolate.
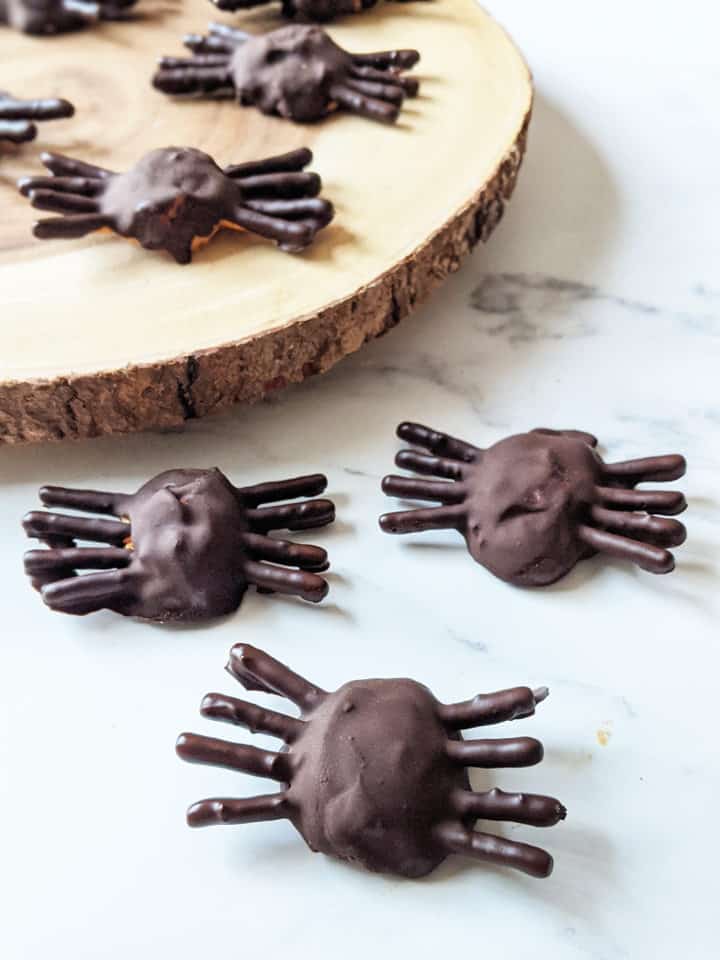
When they’re ready, gently dip them top down into the melted chocolate. Make sure the legs are thoroughly covered in chocolate. The bottom of their “bodies” doesn’t need to be covered but you can completely submerge them if you want them even chocolatier. Make sure your dish is big enough to accommodate their legs.
Place them back on the sheet or plate and freeze them for at least another 20 minutes.
You can store these covered in the refrigerator for a week or freeze them for a nice cold treat.

I recommend keeping them cold until ready serve. They should be fine at room temperature for awhile but be prepared to get chocolate on your hands. Have some napkins nearby if you’re serving them to guests.
These are perfect for any Halloween party as an hors-doeuvre or dessert.
If you enjoyed this recipe please leave a comment below and give it 5 stars! Or on Pinterest (don’t forget to follow me!) you can now add pictures into reviews, too, and be sure to help me share on facebook!
Want to Save This Recipe?
Enter your email below and we’ll send it straight to your inbox! Plus, get weekly free recipes!
By submitting this form, you consent to receive emails from Health My Lifestyle.
Chocolate Peanut Butter Spiders
Ingredients
- ½ cup all-natural peanut butter creamy
- 100 g dark chocolate vegan
- 32 pretzel sticks
Instructions
- Roll the peanut butter into balls, about 1 tablespoon each. If the peanut butter is too runny, place in the refrigerator or freezer for 10 minutes until it's more manageable. Place the peanut butter balls on a baking sheet or plate lined with wax paper or aluminum foil. Set in the freezer for 20 minutes to harden.
- Right before the 20 minutes are up, melt the chocolate. Place the chocolate in a microwave-safe dish and heat for 15-30 second intervals, stirring in between. Careful not to burn the chocolate. Usually you can stir out the last remaining lumps without needing to microwave more.
- Remove the peanut butter balls from the freezer and add the pretzels. Break each pretzel stick in half and use the broken end to gently push into the ball on either side to create “legs”. It’s easier to first lift all the balls off the sheet so they’re no longer “stuck”, then add legs. This ensures that you don’t have trouble getting any unstuck from your choice of liner and accidentally knocking off any legs to the ones you’ve already added.
- At this time, you may want to place them back in the freezer for 5 more minutes to firm up even more before coating them in chocolate.
- When they're ready, gently dip them top down into the melted chocolate. Make sure the legs are thoroughly covered in chocolate. The bottom of their "bodies" doesn't need to be covered but you can completely submerge them if you want them even chocolatier. Make sure your dish is big enough to accommodate their legs.
- Place them back on the sheet or plate and freeze them for at least another 20 minutes.
Notes
Nutrition
Pin this for later:
Please note this post may contain affiliate links which do not impact the cost to you but provides a small commission to keep this site running. Thank you for your support!


These chocolate peanut butter spiders are great! Made them for a halloween party and they were gobbled up!
I’m so glad! They’re one of my favorite halloween treats 🙂