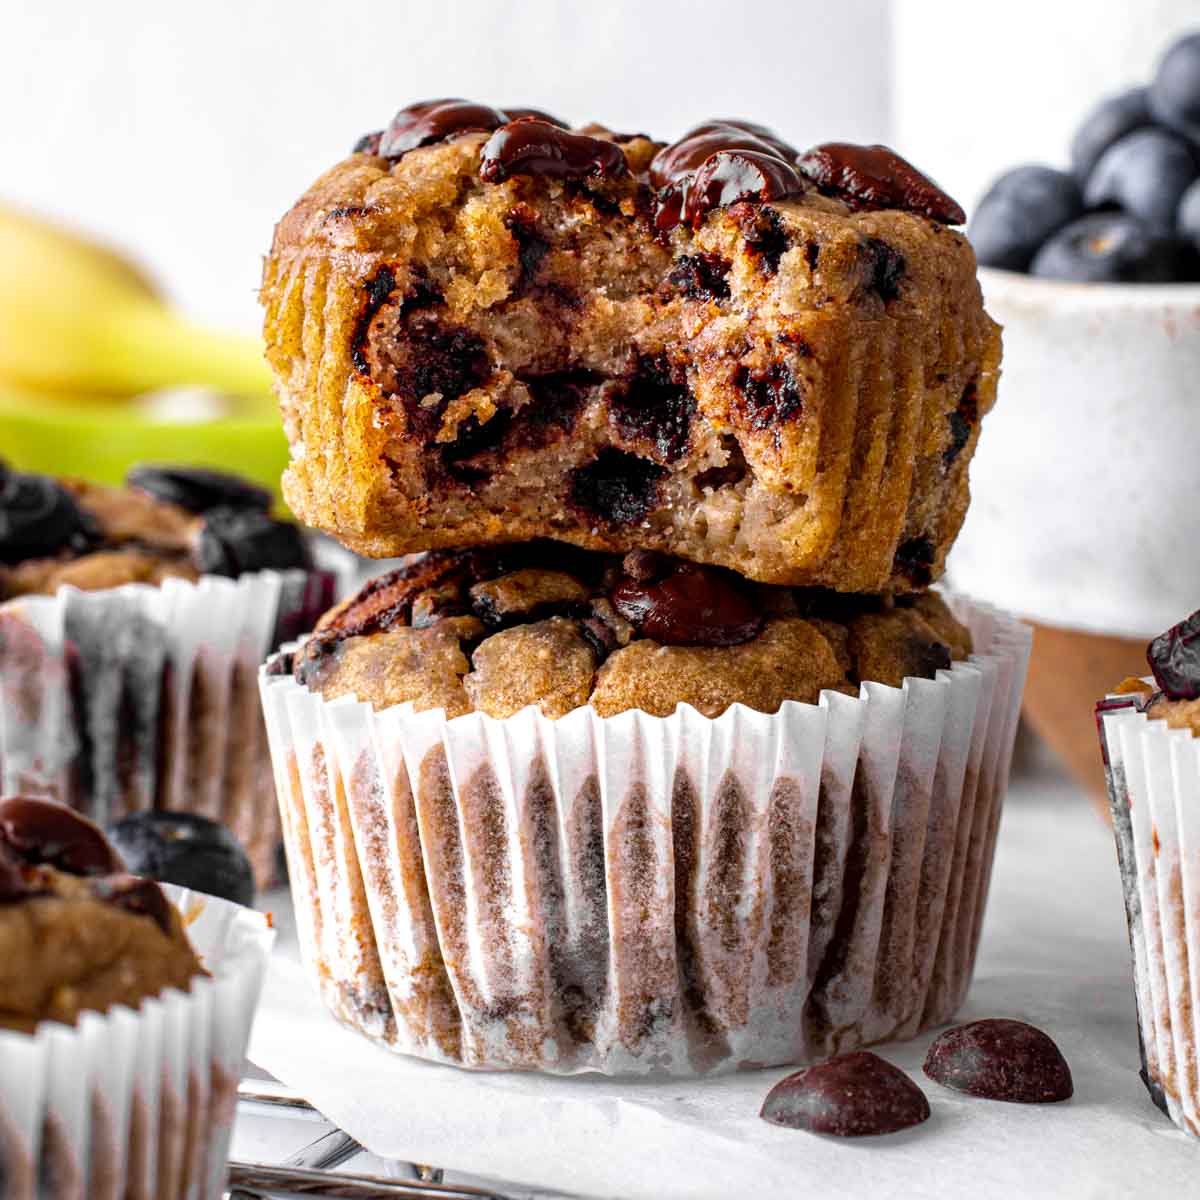
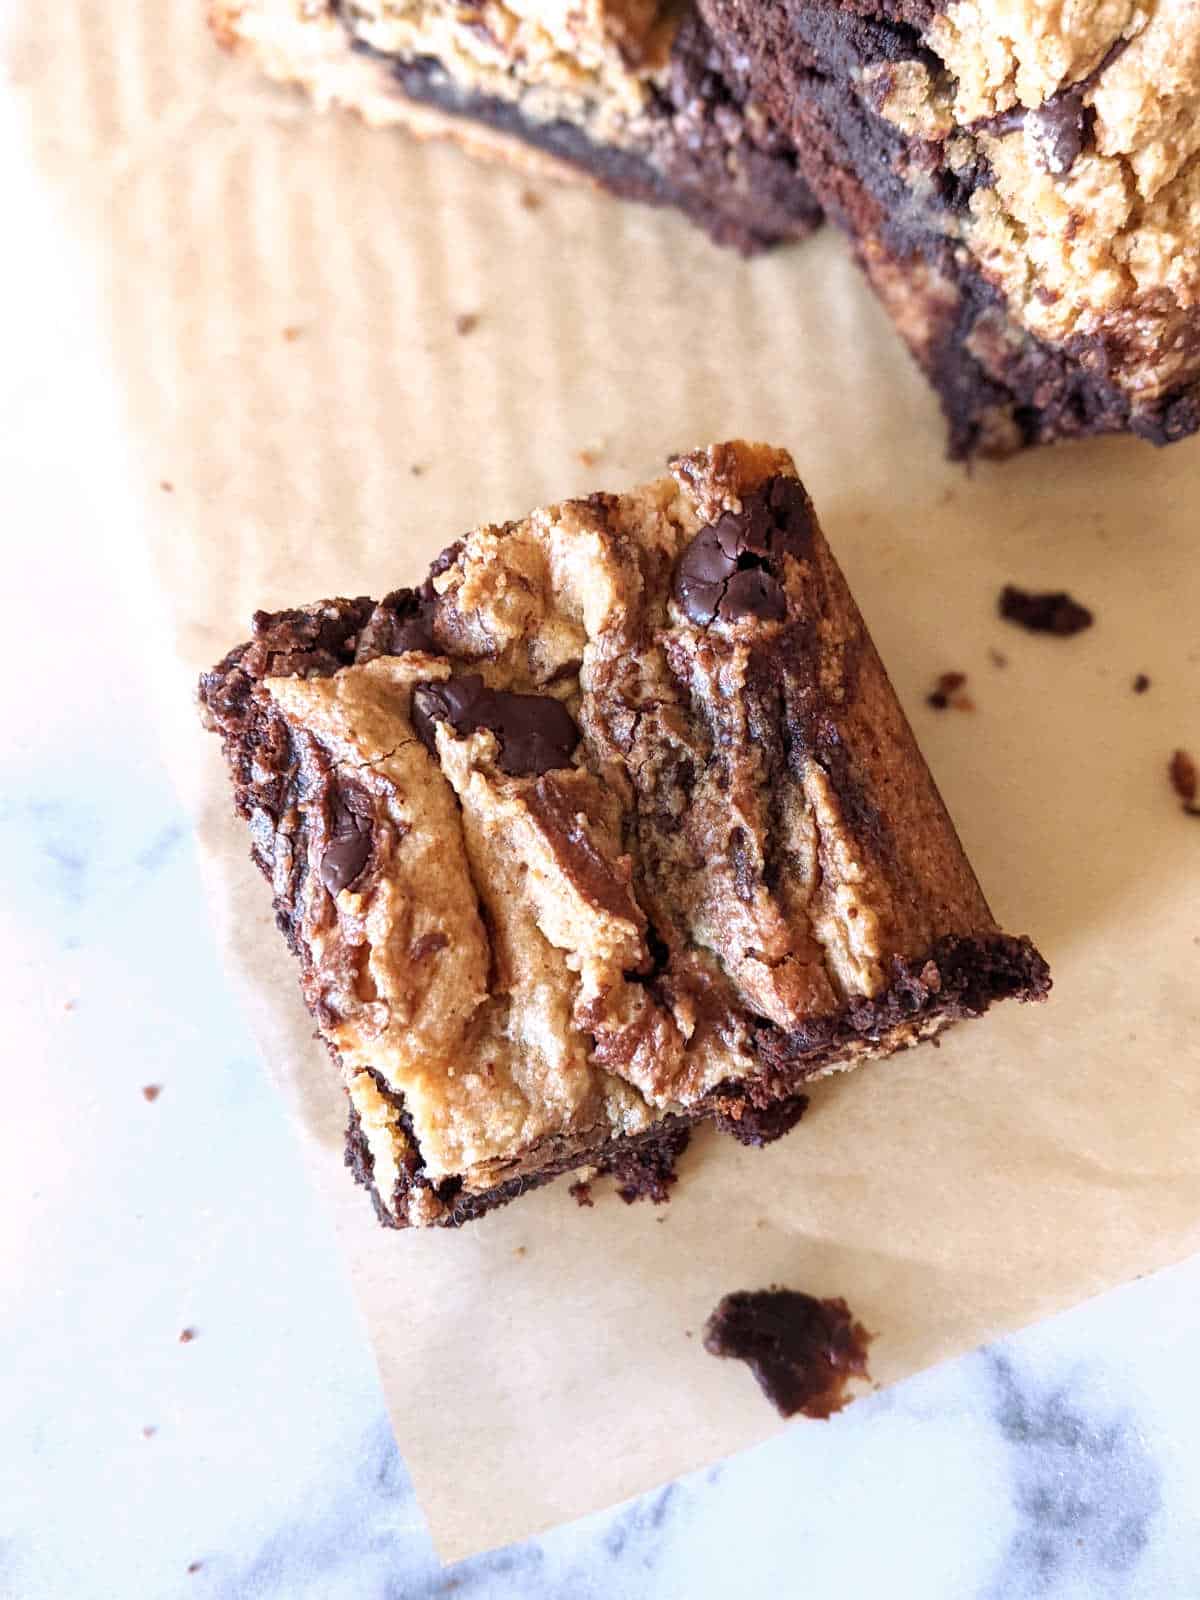
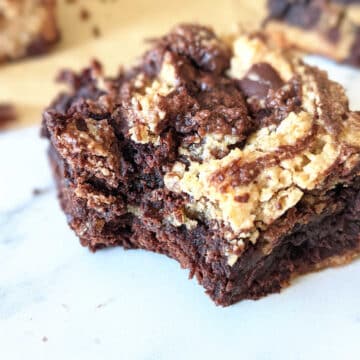
Craving a brownie and a blondie? Have both! These brownie blondies are the ultimate combination of the two! They’re chewy and fudgy, and easy to make! You’re going to love it!
This post may contain affiliate links. Read my policy page for more information.
Why this the best brownie blondie recipe
If you’ve never had a brownie blondie you’re in for a treat! I love the fudginess of brownies and the caramel cookie bar texture of blondies, so I decided to combine the two!
Baking brownies and blondies together in the same pan not only works, it tastes amazing!
If you’re thinking that making two different batters is a lot of work, think again. Brownies and blondies use a lot of the same ingredients so it’s not that much extra work. You’ll just need two mixing bowls instead of one.
I decided to make these brownie blondies eggless, dairy-free and oil-free by using a nut butter as the fat and aquafaba (canned chickpea liquid) for the eggs. It worked wonderfully but if you’re allergic to nuts you can use butter or oil instead.
Yes, these brownie blondies are vegan, but you’d never know! They honestly taste so good, your friends would never know these don’t have any dairy or eggs. They’re great on their own or served with a dollop of vegan whipped cream!
This is truly the best brownie blondie recipe hands-down. It’s:
- Fudgy
- Rich and decadent
- Made with simple ingredients
- Easy to make
- Ready in less than an hour
- and completely satisfies that sweet tooth!
Ingredient notes
You only need 10 simple ingredients to make these brownie blondies. Exact measurements can be found in the printable recipe card below.

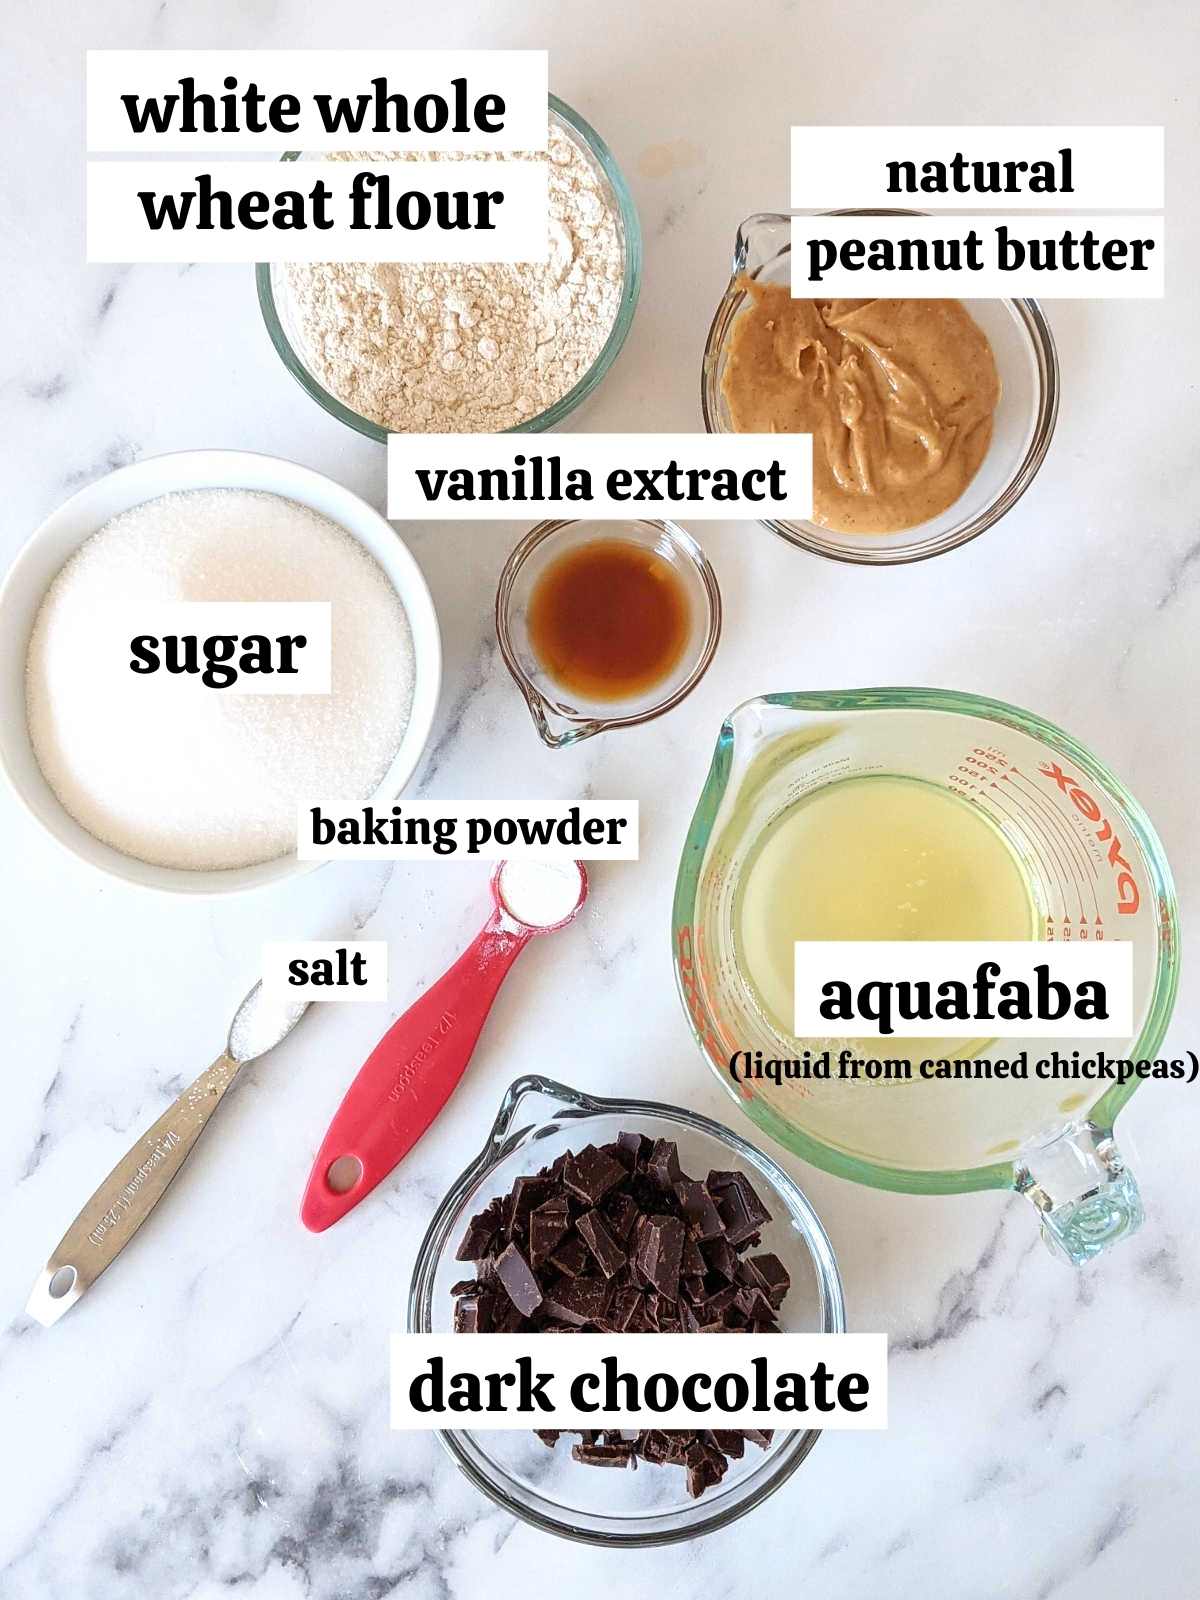
White whole wheat flour—I have not tested this recipe with other flours but an all-purpose flour should work. I prefer to use whole wheat for the extra fiber and nutrients, and white whole wheat in particular because it’s less bitter than regular whole wheat flour. It works well in sweet recipes like this and is virtually undetectable as a healthier flour.
Aquafaba—this is simply the liquid from a can of chickpeas (garbanzo beans). It’s a great egg alternative for those that prefer eggless or vegan baking. Otherwise you can use an egg.
Cocoa powder—I used unsweetened Dutch Processed Cocoa Powder for this recipe. It has a milder, less bitter flavor compared to regular cocoa powder but you can use either.
Sugar—I chose to just use white granulated sugar for both to keep it simple but you can also use brown sugar in the blondies for a more caramel, butterscotch flavor, as brown sugar is the traditional sugar used. However, I find it still tastes delicious with white sugar!
How to make
This step-by-step walkthrough shows the process of making these brownie blondies. Exact times and temperatures can be found in the recipe card below.
1. Preheat oven to 350F and prepare an 8×8 metal baking pan with parchment paper. Allow some paper to hang over the sides to make it easier to remove from the pan later.
2. Make the brownie batter first. Start by adding the aquafaba to a large mixing bowl. Using an electric hand mixer, whisk it for a minute or two to whip air into it and bubbles form. Add in the sugar and continue whisking for another minute until a thin paste forms.


3. Melt the chocolate and microwave it for 1-2 minutes, in 30-second intervals stirring in between until melted. Add the peanut butter, melted chocolate, milk, and vanilla extract and stir until combined.
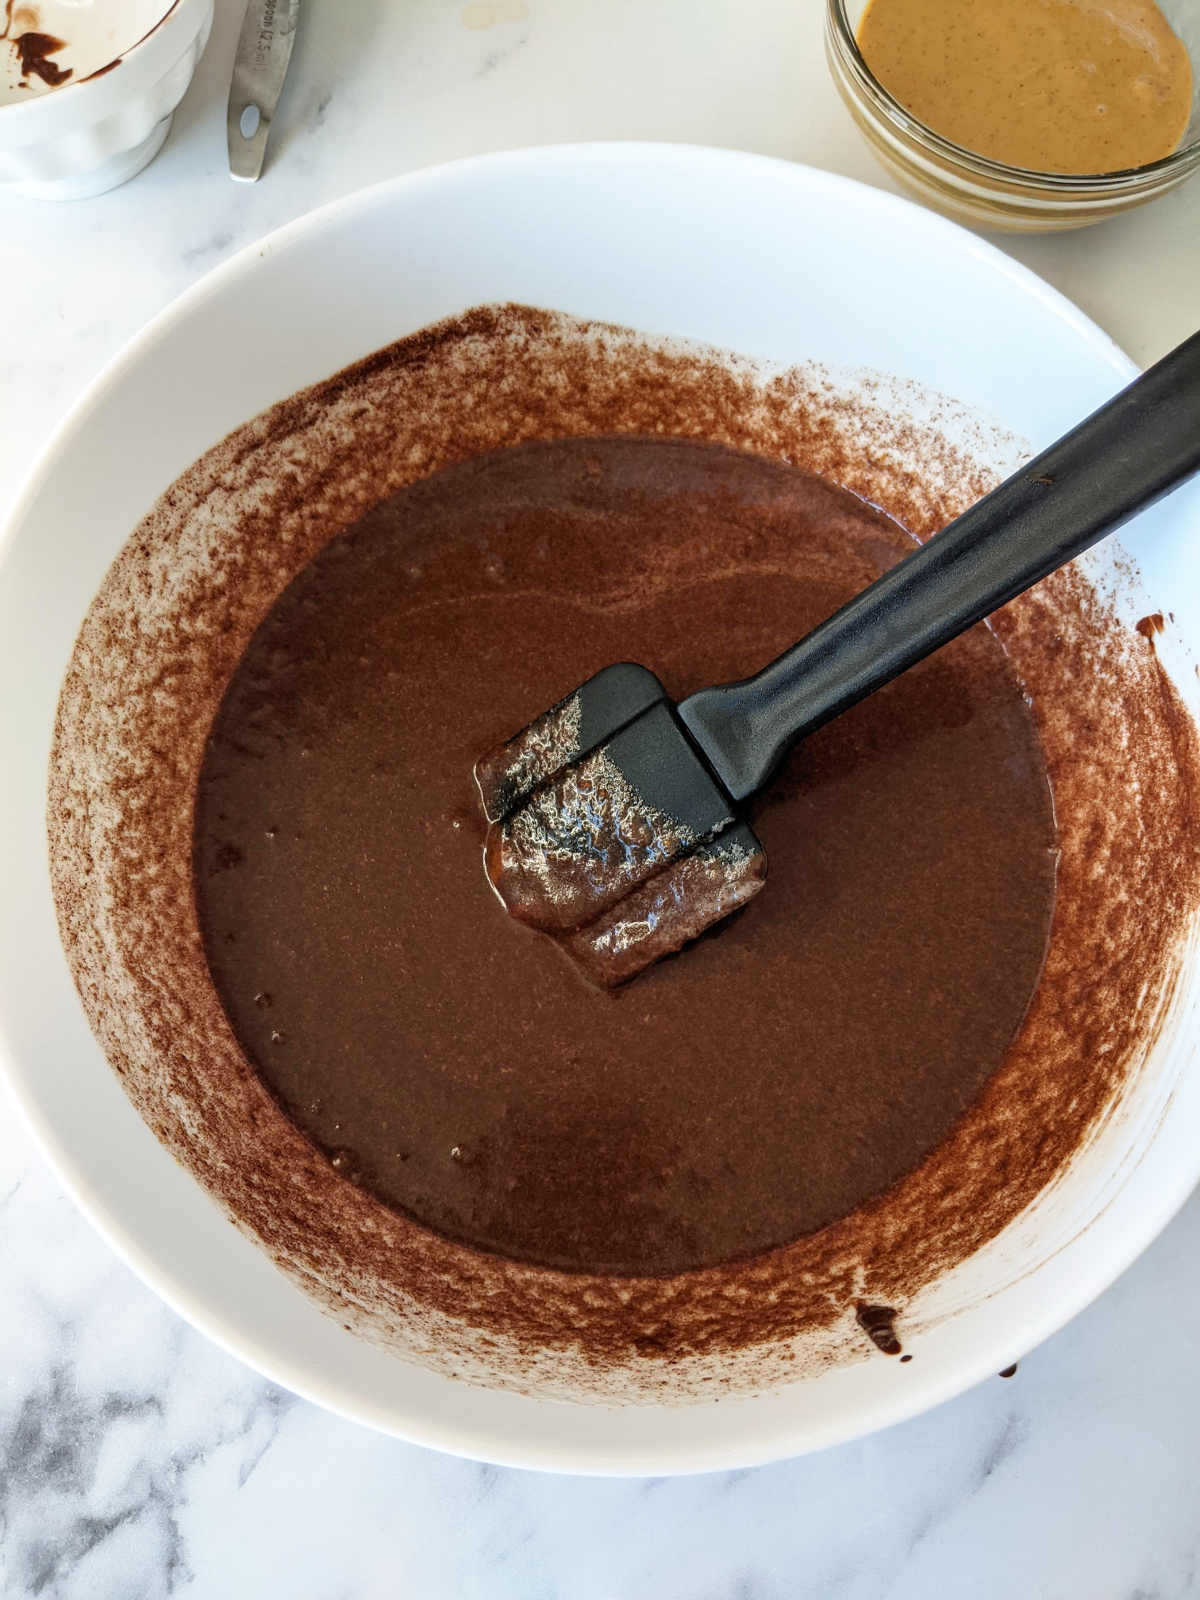
4. Add the cocoa powder and flour. I chose to sift it in to avoid and lumps but you can skip that if you don’t have the time. Then add the salt and stir to combine just until no more dry flour is visible.

5. Transfer the brownie batter to the prepared baking pan and smooth out to create an even layer. Set aside.
6. Make the blondie batter next. Add the aquafaba, sugar, peanut butter, and vanilla extra to a second large mixing bowl. Stir well to combine. No need to whisk this batter like we did the brownies.

7. Add the flour, baking powder and salt and stir until just combined. Then fold in the chocolate chunks. The batter will be thicker, more like cookie dough consistency.

8. Add the blondie batter to the pan on top of the brownie batter and spread out into an even layer. Swirl the two together if desired using a spatula or butter knife, weaving back and forth through both batters to combine; careful not to mix too much.

9. Bake on the center rack for 40-45 minutes until the center no longer jiggles and a toothpick inserted into the center comes out with no wet batter (some melted chocolate from the chocolate chunks is ok).
You can tell that your brownie blondies are done baking when they have a nice shiny crackled top and they don’t wobble in the center.

10. Allow to cool in the pan for 10-15 minutes before slicing. I know it’s hard to resist, but they continue to set as they cool. If you slice into them too soon they may be too gooey.
For gooey-er brownies you can slice in the pan after 10-15 minutes of cooling, or for more cookie bar, denser texture brownies, remove from pan and allow to cool completely before slicing.
How to store
These brownie blondies should be stored in an airtight container on the counter for up to 5 days or in the refrigerator for up to a week.
They taste great at room temperature but you can also warm them up in a microwave for 15-30 seconds.
Expert tips
Measuring: Measure flour with a kitchen scale if you have one. If not, the second best way to measure flour is by scooping spoonfuls into your measuring cup and then leveling it off with something flat like the back of a knife. Do not pack it down, just scoop enough to overfill and then level off the excess. This ensures you don’t use too much flour.
Mixing: Don’t over mix the batters. Mixing too much causes the gluten matrix to start developing and creating too dense of a batter.
Baking: Use a metal baking pan, not glass. Glass takes longer to bake and can cause uneven baking when it comes to these brownie blondies. When baking, make sure to pull them out once the center has set (no more jiggle) and the toothpick inserted into the center comes out clean (a few wet crumbs and melted chocolate is fine but no wet batter).
Chocolate: Use a quality chocolate bar or semi-sweet chocolate chips, no baking chocolate. This will produce the best, smooth chocolate flavor. I use 72% cacao dark chocolate from Ghirardelli. This has just the right amount of sweetness without being too bitter.

FAQ’s
The crackled shiny top comes from whisking air into the eggs. In this case we used aquafaba and whisked for a couple minutes until lots of bubbles formed. Then whisk the sugar into it as well. This is best done with an electric hand mixer but you can also do it by hand.
The sugar and fat content also contribute to a crackly top so I don’t recommend reducing the sugar or the chocolate. Otherwise, expect it to be more like a cake brownie and less fudgy.
If this is the case it may be due to using a glass baking pan. Glass takes longer to heat up, causing the batter to take longer to bake.
Something else to consider with glass it that it also retains heat longer which can lead to over baking. By the time the center of your brownie blondies are done, the outside may be over baked and hard because of the heat the glass retains. My recommendation is to use a metal baking pan.
Both are considered a cookie bar, the difference comes down to the chocolate. They have the same base recipe but brownies will have cocoa powder, and if they’re a fudgy brownie they will also have chocolate added.
Blondies on the other hand will have white or dark chocolate chips added, but no cocoa powder or melted chocolate. They’ll also often have baking powder to help them rise slightly for a cookie bar texture and will use brown sugar for a more butterscotch-like flavor.
More easy dessert recipes

If you enjoyed this recipe please leave a comment below and give it 5 stars! Or on Pinterest (don’t forget to follow me!) and please help me share on facebook!
Want to Save This Recipe?
Enter your email below and we’ll send it straight to your inbox! Plus, get weekly free recipes!
By submitting this form, you consent to receive emails from Health My Lifestyle.
Epic Brownie Blondies
Method
- Hand Mixer/Electric Whisk
Ingredients
Brownie:
- ⅓ cup aquafaba liquid from a can of chickpeas
- 1 cup sugar 190g
- 3 tbsp all-natural peanut butter * warmed in the microwave for 30 seconds to one minue
- 3 tbsp unsweetened non-dairy milk I used almond milk
- 1 tsp pure vanilla extract
- ⅓ cup dutch process cocoa powder 30g
- ¾ cup white whole wheat flour 96g
- 3.5 oz dark chocolate bar roughly chopped, or semi-sweet chocolate chips
- ½ tsp salt
Blondie:
- ¼ cup aquafaba liquid from a can of chickpeas
- ¾ cup sugar
- ¼ cup all-natural peanut butter * warmed in the microwave for 30 seconds to 1 minute
- 1 tsp pure vanilla extract
- ¾ cup white whole wheat flour
- ½ tsp baking powder
- ¼ tsp salt
- ⅓ cup dark chocolate bar chopped, or semi-sweet chocolate chips
Instructions
- Preheat oven to 350°F (180°C) and prepare an 8×8 metal baking pan with parchment paper. Allow some paper to hang over the sides to make it easier to remove from the pan later.
For the brownies:
- Start by adding the aquafaba to a large mixing bowl. Using an electric hand mixer, whisk it for a couple minutes to whip air into it and bubbles form. Add in the sugar and continue whisking for another minute until a thin paste forms. You can also use a whisk by hand but it will take more time.1/3 cup aquafaba, 1 cup sugar
- Melt the chocolate in a microwave-safe dish in 30-second intervals stirring in between until melted (can also use a double boiler but that takes more time). Add the peanut butter, melted chocolate, milk, and vanilla extract and stir, using a silicone spatula or spoon until combined.3 tbsp all-natural peanut butter, 3 tbsp unsweetened non-dairy milk, 1 tsp pure vanilla extract, 3.5 oz dark chocolate bar
- Add the cocoa powder and flour. I chose to sift it in to avoid and lumps but you can skip that if you don't have the time. Then add the salt and stir to combine just until no more dry flour is visible.1/3 cup dutch process cocoa powder, 3/4 cup white whole wheat flour, 1/2 tsp salt
- Transfer the brownie batter to the prepared baking pan and smooth out to create an even layer. Set aside.
For the blondies:
- Add the aquafaba, sugar, peanut butter, and vanilla extra to a second large mixing bowl. Stir well to combine (no whisking needed for this batter).1/4 cup aquafaba, 3/4 cup sugar, 1/4 cup all-natural peanut butter, 1 tsp pure vanilla extract
- Add the flour, baking powder and salt and stir until just combined. Then fold in the chocolate chunks/chips. The batter will be thicker than the brownie batter, more like cookie dough consistency.3/4 cup white whole wheat flour, 1/2 tsp baking powder, 1/4 tsp salt, 1/3 cup dark chocolate bar
- Add the blondie batter to the pan on top of the brownie batter and spread out into an even layer. Swirl the two together if desired using a spatula or butter knife ,weaving back and forth through both batters to combine; careful not to mix too much.
Bake:
- Bake on the center rack for 40-45 minutes until the center of the brownie blondies no longer jiggles and a toothpick inserted into the center comes out with no wet batter (some melted chocolate from the chocolate chunks is ok).
- You can tell that your brownie blondies are done baking when they have a nice crackled top and they don't wobble in the center.
- Allow to cool in the pan for 10-15 minutes before slicing. For gooey-er brownies you can slice in the pan after 10-15 minutes of cooling, or for more denser, cookie bar texture, remove from pan and allow to cool on a wire rack completely before slicing.